Review: Bienfang Gridded Paper

In my roster of tools, I have things that I simply love to use, like my Leuchtturm sketchbook. I also have tools that just make things easier. Anything that helps me get my work done more efficiently gets top marks.
While on vacation in the summer of 2016, I dropped into a Blick art store in Boston. I always love cruising the art store, and usually buy way more stuff than I need. It was here I came across Bienfang Gridded Paper.
I don’t need to practice drawing grids, and my time—and I’m sure yours—would be better spent drawing actual letters and shapes.
This isn’t a product that I’ll use on all my projects. If what I’m working on involves more illustration or curved letters, then I’ll draw my own guidelines. For explorer kitten (below), I used a freehand grid.

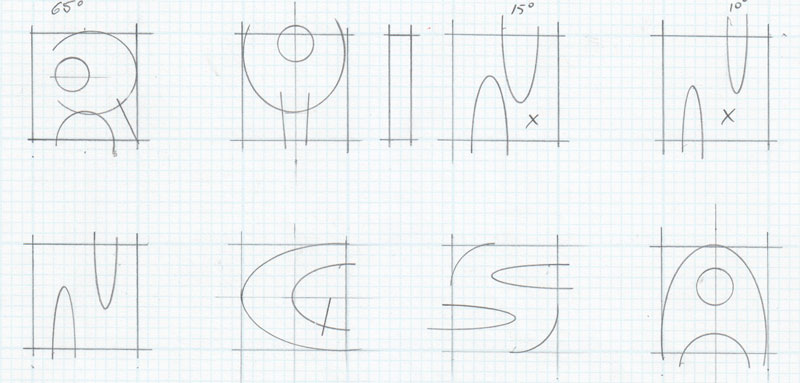
However, if I’m designing more precise, custom letters, where size and spacing are critical, then the gridded paper is a huge time saver. I wouldn’t necessarily consider paper as a tool that makes things “easier” (though an exception may be tracing paper). But in this case, easy is the operative word. You can see a few examples below where I used the grid to design custom letters. The first was for my Frying Saucer piece. The second my Area 51 road sign. Note that they are not to scale with each other.


And here’s an example (below) of a more comprehensive layout for my Magic Transistor Radio piece. I use the circles as a guide to keep the widths consistent.

Each sheet is printed on both sides. I’m not sure what the advantage to that is, but it’s there. The 50-sheet pads are available in three different grid cross-sections: 4×4, 8×8 and 10×10 to the inch, with the grid lines on the inch marks being heavier. The cross-sections are available in the following sizes:
4×4: 8.5″ x 11″, 11″ x 17″ and 17″ x 22″
8×8: 8.5″ x 11″ and 11″ x 17″
10×10: 8.5″ x 11″ and 11″ x 17″
The paper is a 19lb bond, similar to the tooth on laser paper, but a bit smoother. The grid is printed with non-reproducible blue lines. This makes it easy to eradicate them in Photoshop. When I import a sketch into Photoshop or Procreate (on my iPad Pro), I like to have it as clean as possible.

Above: Scanned image, as is, with no adjustments. Below: Scanned image with grid removed.

To remove the grid, open the image in Photoshop and go to Window > Channels. Highlight the Red channel in the menu and select all (Mac: CMD-A, PC: CTRL-A) and then delete (Mac: CMD-DELETE, PC: CTRL-DELETE). Do the same for the Green channel. This should remove most of the blue lines. Highlight the Blue channel, then go to Image > Adjustments > Levels … (Mac: CMD-L, PC: CTRL-L) and adjust the sliders to darken the artwork. Export your art.

I use the 10×10 cross-section in the letter-size pad. I find this gives me the most granularity for the grid, and the size is a manageable one to work with.
The grid can be a bit difficult to see on my light pad (reviewed here), so I will usually turn down the intensity. I typically use pencils, but any fine-nibbed felt pen should work. A brush marker won’t do well on this paper. There’s just not enough weight to prevent pooling or wrinkling.
Ironically, even though it’s made in Canada, I’ve never been able to find any in the stores here. It is available through amazon.ca, however.
It’s one of those products I never knew I needed.
