In the previous post, we imported and converted our pixel-based artwork into vector. Let’s go ahead and start editing our paths.
Select your art with the Selection Tool (Keyboard: V). That’s the solid arrow. Go to Object > Ungroup (Mac: SHIFT-CMD-G: PC: SHIFT-CTRL-G). This will ungroup all the elements into separate pieces so we can edit and move them around.
NOTE: You may have to perform this command a few times before it does its thing. You’ll know it’s done when the ungroup command is greyed out.
To create our flat shapes, we’ll need to delete a few paths from the art. We want a single path outlining each of our shapes. Right now we have what looks like a path, but it’s actually an outlined path.

What our “path” looks like (left). What is really is—an outlined path (right) .
If you want to bypass this step in the future, you’ll need to fill in your shapes completely with black when inking. It’s a matter of preference. While I don’t mind using up paper—a very renewable resource—I don’t like to use up my pens by doing lots of inking. I also find doing this step in Illustrator much faster.
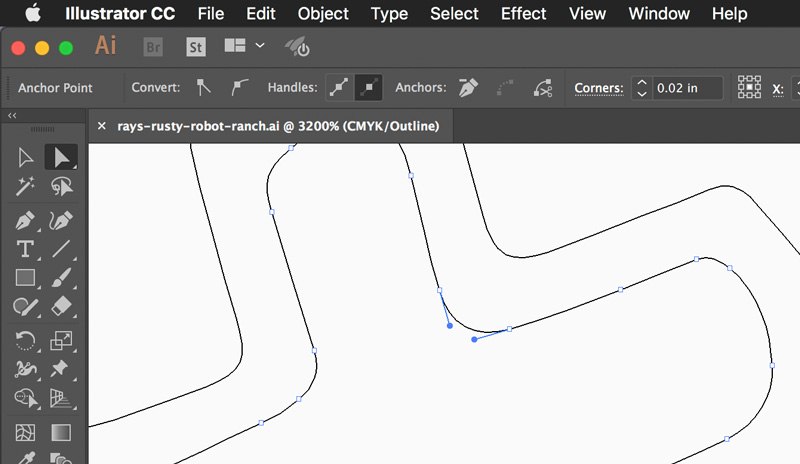
To create the single path, select the Direct Selection Tool (Keyboard: A). That’s the hollow arrow. Select one of the inner paths on your art. In the example below, I’ve zoomed in to show one of the screws. On the left, I’ve selected the inner path along the circle. Hit delete as many times as it takes to completely delete the path—usually it’s two. Do the same for the inner path (the centre image). We’re now left with our cleaned up shape, on the right.

However, we now have a black shape sitting on top of a black shape (below left). I want that inner piece to be white. I prefer not to colour those pieces, as it effectively makes the screw into two separate parts. Instead, I’ll select both paths —the circle and the “phillips head” portion with the Selection Tool (Keyboard: V)—and go to Object > Compound Path > Make (Mac: CMD-8, PC: CTRL-8). This will cut a “hole” in the art, and make it one piece. If you want the inner part to be another colour, then bypass this step and simply colour the inner part.
If the shape doesn’t have a “hole”, then you don’t need to run the compound path command.

I’ll then perform the same steps on the lettering portion of my art. Any letters or shapes that have a hole*, I’ll run the Compound Path command to combine them.
Once I have all the paths the way I want them, I’ll change the black to a light grey. I find this easier on the eye while I’m building the art.

In the next post, we’ll add our robot cowboy and some colour.
* I use the term “hole” here for the purpose of clarity. When we have a hole inside a letter it will have several different names—bowl, loop, eye and counter. I’ll get into all the different parts of a letter in a future post.